


Abstract
This document provides a comprehensive exploration of the process and significance of creating a simple paper bag by hand. It deconstructs the procedure into a series of manageable, sequential steps, beginning with the selection of appropriate materials and culminating in the final shaping and customization of the object. The inquiry extends beyond mere instruction, situating the craft within a broader historical and environmental context. It examines the evolution of the paper bag from an industrial commodity to a symbol of sustainable practice, referencing key innovations that shaped its modern form. An analysis of different paper types, their material properties, and their suitability for this application is presented. The guide aims to be universally accessible, offering clear, rationalized instructions that illuminate the geometric principles and structural logic underlying the bag’s construction. The objective is to empower individuals with the practical knowledge to create functional, aesthetically pleasing paper bags, while fostering a deeper appreciation for the object’s design, utility, and its role in contemporary discussions surrounding environmental responsibility.
Key Takeaways
- Select the right paper; its weight and texture determine the bag’s strength and purpose.
- Precise measurements and sharp, clean folds are foundational to a sturdy, well-formed bag.
- The diamond fold is the essential technique for creating a stable, flat bottom.
- Master how to make the easiest paper bag to create customized, sustainable packaging.
- Adding gussets, or side creases, gives the bag a professional, expandable shape.
- Handles can be crafted from paper, ribbon, or twine to suit the bag's intended use.
- Personalize your bags with stamps or labels for unique gifts or branding.
Table of Contents
- The Enduring Appeal of the Paper Bag: A Brief History and Context
- Gathering Your Tools: The Foundation of a Perfect Paper Bag
- Step 1: Measuring and Cutting Your Paper to Size
- Step 2: The Foundational Folds for the Bag’s Body
- Step 3: Constructing the Flat Bottom for Stability
- Step 4: Finalizing the Bag's Shape
- Step 5: Adding Handles and Personal Touches
- Beyond the Basics: Scaling and Adapting Your Design
- The Environmental and Economic Dimensions of DIY Paper Bags
- Frequently Asked Questions (FAQ)
- Conclusion
- References
The Enduring Appeal of the Paper Bag: A Brief History and Context
The humble paper bag, an object so commonplace it often escapes our notice, carries within its folds a rich history of innovation, social change, and evolving environmental consciousness. To learn how to make the easiest paper bag is to participate in a tradition that connects industrial ingenuity with a modern desire for sustainable, hands-on creation. Its existence is a testament to the human capacity for seeing potential in simple materials and for refining a design to its most functional and elegant form. Before we embark on the practical steps of its creation, it is useful to understand the journey this object has taken through time.
From Industrial Revolution to Environmental Revolution
The story of the paper bag as we know it begins in the mid-19th century, a period of fervent invention. In 1852, a man named Francis Wolle patented the first machine for producing paper bags automatically (YoonPak, 2024). His invention marked a significant leap in productivity, moving the bag from a painstakingly hand-assembled item to a mass-produced convenience. Yet, these early bags were shaped like envelopes, lacking the flat bottom that would make them truly practical. They could not stand upright on their own, a limitation that constrained their utility.
The crucial breakthrough came from an unlikely source: a woman working in a paper bag factory. Margaret E. Knight, in 1871, devised a machine that could automatically fold and glue a flat, square bottom onto paper bags, giving them the familiar structure we recognize today (YoonPak, 2024). Knight's invention was revolutionary because it endowed the bag with stability. A bag that could stand on its own was a bag that could be packed more easily, hold more goods, and sit securely on a shop counter or a kitchen table. This single innovation transformed the paper bag from a mere novelty into an indispensable tool for commerce and daily life. As concerns about plastic pollution have grown, the paper bag has experienced a renaissance, championed as a more sustainable alternative due to its origins in renewable resources and its biodegradability (Oyang Group, 2024).
The Psychology of Packaging: Why a Simple Bag Matters
Packaging does more than just contain an item; it communicates. It is the first physical interaction a person has with a product or a gift. A thoughtfully chosen or crafted container can shape expectations, convey care, and enhance the perceived value of what lies within. A handmade paper bag, in its simplicity, speaks volumes. It suggests a personal touch, an investment of time and effort that a generic plastic or mass-produced bag cannot replicate.
Think about the experience of receiving a gift. When the gift is presented in a bag that is itself a product of craft, the act of giving is elevated. The packaging becomes part of the gift itself, a prelude that builds anticipation and signals thoughtfulness. For small businesses, this principle is a powerful marketing tool. Custom packaging, even a simple paper bag adorned with a logo, can create a memorable brand experience. The choice of an eco-friendly paper bag also sends a clear message about a company's values, aligning the brand with principles of sustainability and environmental stewardship. The tactile quality of paper—its texture, its weight, the sound it makes—engages the senses in a way that smooth, uniform plastic does not, creating a richer and more humanized experience.
Understanding Paper as a Material: Kraft, Recycled, and Beyond
The term "paper" encompasses a vast family of materials, each with distinct properties. The success of our project depends on choosing the right kind. The most common material for commercial paper bags is Kraft paper, a German word meaning "strength." Developed in the late 19th century, Kraft paper is produced from wood pulp in a process that leaves most of the lignin in, resulting in a durable, tear-resistant paper with a characteristic brown color (OT Pack, 2024). Its strength makes it ideal for grocery bags and sturdy retail packaging.
Beyond Kraft, many other options exist. Recycled paper offers a more sustainable choice, giving a second life to post-consumer waste. Its texture is often less uniform than virgin paper, which can add a rustic, artisanal charm to a handmade bag. For lighter-duty applications, such as small gift bags or party favors, the possibilities are endless. Decorative wrapping paper, thick-stock scrapbook paper, or even old maps and newspapers can be repurposed. Each choice carries its own aesthetic and structural implications. A bag made from a glossy, thin wrapping paper will be vibrant and delicate, suitable for a lightweight treasure, while a bag constructed from heavy cardstock will be rigid and robust, capable of holding something more substantial. Understanding these material characteristics is the first step in learning how to make the easiest paper bag that is not only beautiful but also fit for its purpose.
Gathering Your Tools: The Foundation of a Perfect Paper Bag
Before the first fold is made, a craftsman must assemble their tools. The creation of a paper bag is an exercise in precision and care, and having the right equipment on hand makes the process smoother, more enjoyable, and ultimately more successful. While the list of necessities is short and the items are common, their quality and proper use are paramount. Let us consider the essential implements for this task, as well as some optional additions that can elevate your creation from simple to sublime.
Selecting the Right Paper: A Material Deep-Dive
The paper is the soul of the bag. Its selection is the most critical decision you will make. As discussed, the paper's weight, texture, and finish will define the bag's character and capability. For your first attempt at how to make the easiest paper bag, a sheet of A3 or 11×17 inch printer paper or a piece of brown Kraft paper from a roll is an excellent starting point. These materials are forgiving, easy to fold, and strong enough to create a functional bag.
As you gain confidence, you can explore other materials. Consider the following table to guide your choice based on the intended use of the bag.
| Paper Type | Common Weight | Best For | Characteristics |
|---|---|---|---|
| Kraft Paper | 40-80 lb (60-120 gsm) | Groceries, retail, sturdy gifts | Strong, durable, tear-resistant, classic brown or white. |
| Wrapping Paper | 20-30 lb (30-45 gsm) | Small, lightweight gifts | Decorative, colorful, but can tear easily if overloaded. |
| Cardstock | 65-110 lb (175-300 gsm) | Luxury gift bags, heavy items | Stiff, holds shape well, wide range of colors and textures. |
| Newspaper | 30 lb (45 gsm) | Seedling starters, small favors | Eco-friendly, upcycled, interesting visual texture, not very strong. |
| Parchment Paper | 25-40 lb (40-60 gsm) | Food items like cookies, bread | Grease-resistant, non-stick, suitable for paper food packaging. |
When selecting your paper, think about the object the bag will hold. Is it heavy? Is it delicate? Does it have sharp corners? A heavier book will require the resilience of cardstock or heavy Kraft paper, while a delicate scarf could be beautifully presented in a bag made from elegant wrapping paper.
Essential Tools: Scissors, Rulers, and Adhesives
With your paper chosen, you need just three other essential tools.
-
A Ruler: Precision begins with measurement. A sturdy, straight-edged ruler of at least 12 inches (30 cm) is indispensable. A metal ruler is preferable as its edge will not be nicked by scissors or a craft knife. It serves not only for measuring but also for guiding folds to ensure they are perfectly straight.
-
A Cutting Implement: A sharp pair of scissors will work well for cutting your paper to size. For exceptionally straight and clean cuts, especially on thicker paper like cardstock, a craft knife (like an X-Acto knife) used with a self-healing cutting mat is the superior choice. Whichever you use, sharpness is key; a dull blade will tear or fray the paper's edge.
-
An Adhesive: The bag is held together by glue. A standard glue stick is sufficient for lightweight paper and is a clean, easy-to-use option, making it perfect for beginners. For a stronger, more permanent bond, especially with heavier paper, a liquid craft glue like PVA glue or a double-sided tape is more effective. When using liquid glue, apply it sparingly to avoid wrinkling the paper as it dries.
A bone folder, a dull-edged hand tool used to score and crease paper, is a highly recommended but not strictly essential tool. It allows you to make sharp, crisp creases that give the bag a professional finish and enhance its structural integrity. If you do not have one, you can use the edge of your ruler or even a clean thumbnail.
Optional Embellishments for Customization
Once you have mastered the basic construction, you can begin to think about personalization. This is where the simple craft of bag-making transforms into an art form. The possibilities are limited only by your imagination.
- Stamps and Ink: Rubber stamps can be used to apply patterns, logos, or messages to the paper before you begin folding.
- Hole Punch and Ribbon/Twine: A hole punch allows you to create clean openings for adding handles. Threading a beautiful ribbon or rustic twine through the holes can dramatically change the bag's appearance.
- Stickers and Labels: Custom-printed étiquettes adhésives are a simple and effective way to brand your bags for a small business or to label them for organization.
- Drawing and Painting: The flat paper is a blank canvas. Before you fold, you or your children could draw a picture, write a message, or even paint a watercolor design onto the surface.
These embellishments should be considered from the beginning. For instance, if you plan to stamp a pattern, it is much easier to do so on the flat sheet of paper than on the assembled bag.
Step 1: Measuring and Cutting Your Paper to Size
The journey of transforming a two-dimensional sheet into a three-dimensional object begins with a single, crucial action: the cut. The dimensions of your initial rectangle of paper will dictate the final proportions of your bag. This step is not merely about trimming; it is about defining the potential volume and shape of the finished product. An understanding of the simple geometry involved will empower you to move beyond a single template and design bags of any size you wish.
The Mathematics of a Bag: Understanding Proportions
Let us demystify the relationship between the flat paper and the finished bag. Imagine your rectangular sheet of paper. Let its longer side be the Width (W) and its shorter side be the Height (H).
- The Bag's Height: The final height of your bag will be determined by the height of your paper, minus the portion used for the bottom.
- The Bag's Circumference: The width of your paper determines the total circumference of the bag (the distance all the way around).
- The Bag's Depth (Gusset): The depth of the bag is created by the folds you will make in the sides. The size of these side folds, or gussets, will determine how wide the bag can open.
A good starting ratio for a standard gift bag is to have the paper's width be roughly double its height. For example, a sheet of paper measuring 16 inches wide by 8 inches high will produce a well-proportioned bag. The width of the paper (16 inches) will form the bag's circumference, while the 8-inch height will become the bag's height, minus what is used for the bottom. The depth of the bag will be a choice you make during the folding process, but it is typically about one-quarter of the bag's final front-facing width. Do not feel intimidated by the math; a simple practical example will make it clear.
A Practical Walkthrough: Measuring for a Small Gift Bag
Let's make a small bag perfect for a piece of jewelry or a handful of candy. We will start with a standard US letter-sized sheet of paper (8.5 x 11 inches).
-
Orient the Paper: Place the paper on your work surface in a landscape orientation, so the longer side (11 inches) is horizontal and the shorter side (8.5 inches) is vertical. In this orientation, W = 11 inches and H = 8.5 inches.
-
No Cutting Needed (for this example): For your very first bag, using a standard sheet without cutting simplifies the process. The dimensions are already set. The final bag will have a height of a little less than 8.5 inches and a circumference of 11 inches.
If you were to create a bag of a specific size, you would work backward. Suppose you want a bag that is 6 inches tall, 4 inches wide, and 2 inches deep.
- Height of Paper: Bag height (6 inches) + half the depth (1 inch) = 7 inches. Your paper needs to be at least 7 inches tall.
- Width of Paper: (2 x Bag width) + (2 x Bag depth) + Overlap (1 inch) = (2×4) + (2×2) + 1 = 8 + 4 + 1 = 13 inches.
- So, you would cut a rectangle of paper that is 13 inches wide and 7 inches tall.
For now, let us stick with our uncut 8.5 x 11-inch sheet. The goal is to master the folding technique. Once you understand the folds, you can apply them to a rectangle of any size.
Common Pitfalls in Measurement and How to Avoid Them
Precision in this first step prevents problems later. A slightly skewed cut or inaccurate measurement can result in a lopsided bag or a bottom that does not fold neatly.
- The Skewed Cut: This happens when you cut without a guide. Always use a ruler as a straightedge when cutting with a craft knife. If using scissors, draw a light pencil line first and cut along it carefully.
- Inconsistent Overlap: The small flap that you will glue to close the bag's body needs to be consistent. A 1/2 to 1-inch overlap is standard. If it is too narrow, the seam may not be strong. If it is too wide, it wastes paper and can create unnecessary bulk.
- Forgetting the Bottom: A common mistake for beginners designing their own dimensions is forgetting to add extra height to the paper to accommodate the base. Remember, the height of your paper must be the desired final height of the bag plus a little more than half the desired depth of the bag.
Take your time with this initial step. A well-measured and cleanly cut piece of paper is a promise of a beautiful bag to come.
Step 2: The Foundational Folds for the Bag’s Body
With your paper cut to the perfect dimensions, you now transition from measurement to manipulation. The next sequence of folds will transform the flat plane into a tube, which will serve as the body of your bag. This stage is about creating the primary structure. Each crease you make is like a line in an architectural drawing, defining the walls and creating the seams that will hold the object together. Approach this with patience, remembering that crisp, decisive folds are the key to a professional-looking result.
Creating the Central Seam: The Bag's Backbone
The first goal is to form a tube of paper with a single, overlapping seam. This seam will typically run down the center of what will become the back of your bag.
- Position Your Paper: Place your 8.5 x 11-inch sheet of paper on your work surface in landscape orientation (11 inches wide).
- Fold the Edges to the Center: Take the left edge of the paper and fold it towards the center. Do the same with the right edge. You want the two edges to meet and overlap slightly in the middle. Aim for an overlap of about 1/2 inch. It does not need to be perfectly centered, but the overlap is important for gluing.
- A Mental Check: Before you make a permanent crease, just lightly fold the paper to check the overlap. Does it look right? Is it straight? Once you are satisfied, press down firmly along the folds. If you have a bone folder, this is the perfect time to use it. Run it along the folded edges to make them sharp and defined.
- Apply Adhesive: Carefully unfold the flap that is on top. Apply a thin, even line of your chosen adhesive (glue stick or craft glue) along the edge of the underlying flap.
- Secure the Seam: Press the top flap down firmly onto the glued edge. Run your finger or the bone folder along the seam to ensure a strong bond and to smooth out any air bubbles.
You should now have a flat paper tube. This is the fundamental body of your bag. This central seam provides the main structural connection, and ensuring it is straight and secure is vital for the bag's durability.
Folding the Bottom: Preparing for the Base
Now that you have a tube, you need to define the portion that will become the bag's flat bottom. This involves a single, crucial fold. The width of this fold will determine the depth of your bag.
- Orient the Tube: Keep the paper tube flat on your work surface with the seam side facing up.
- Determine the Bottom Fold: Decide how deep you want your bag to be. A good rule of thumb is to make the bottom fold a bit less than half the visible width of one side of the flattened tube. For our 11-inch wide paper, the flattened tube is about 5.25 inches wide (11 inches folded in half, minus the overlap). Let's choose a bottom fold of about 2 inches.
- Make the Fold: Take the bottom edge of the flattened tube and fold it up by your chosen amount (in this case, 2 inches). Use your ruler to ensure the fold is parallel to the bottom edge.
- Crease Firmly: This is one of the most important creases in the entire process. It needs to be very sharp as it will serve as a guide for the more complex folds to come. Use your bone folder or the edge of your ruler to press this fold line with significant pressure.
You now have a flattened tube with one end folded up. This folded section is where all the magic of the flat bottom will happen.
The Importance of Crisp Creases for Structural Integrity
It is worth pausing to reflect on the function of a crease. A fold in a piece of paper is more than a line; it is a structural element. A sharp crease acts like a hinge, allowing the paper to move predictably along a defined path. It also creates a line of rigidity. A softly folded, rounded edge has little structural strength, but a sharply creased edge acts like a small beam, resisting bending and helping the bag hold its shape.
Think of the difference between a crumpled piece of paper and a precisely folded paper airplane. The airplane's ability to fly comes from the rigid structure created by its sharp folds. In the same way, the ability of your paper bag to stand upright, to hold its contents securely, and to look neat and professional is directly related to the quality of its creases. Every time you are instructed to make a fold, take a moment to ensure it is as sharp and exact as you can make it. This attention to detail is what separates a flimsy, homemade craft from a sturdy, handcrafted object.
Step 3: Constructing the Flat Bottom for Stability
This is the most intricate part of the process, but it is also the most rewarding. It is the series of folds that Margaret E. Knight's machine automated, the innovation that allows a paper bag to stand on its own. The technique is often called a "diamond fold" because of the shape it creates. It might look complex at first, but if you follow the steps methodically, you will see a logical pattern emerge. We will be working exclusively with the 2-inch section you folded up at the end of the last step.
The Diamond Fold: A Visual Guide
- Open the Bottom Flap: With the tube still flat and the seam side up, locate the 2-inch flap you folded up. Pry it open. As you do, you will notice the crease you made acts as a hinge. Press the center of this section down towards the body of the bag. This will cause the left and right sides to flare out, forming two triangles. The entire shape should now resemble a diamond or a square resting on its point.
- Align the Corners: The goal is to make this diamond shape as symmetrical as possible. The top and bottom points of the diamond should align with the center line of the paper tube. The two side points should be sharp and well-defined. Take a moment to flatten this diamond shape, pressing all four new creases firmly. You should now see four triangular panels that all meet at the center.
Let's pause and visualize what you have just done. You have taken a flat, folded-up section and rearranged it into a new configuration that distributes the paper in a way that will allow it to form a rectangular base. This is a beautiful piece of paper engineering.
Securing the Base: Tucking and Gluing the Flaps
Now you must secure this diamond shape to form the sealed bottom of the bag. This involves folding the triangular flaps over each other.
- Fold the Top Flap Down: Take the top triangular flap of the diamond and fold it down so its point extends just past the center line of the diamond. Crease this fold sharply.
- Fold the Bottom Flap Up: Take the bottom triangular flap and fold it up so it overlaps the flap you just folded down. Its point should extend well past the center line, creating a generous area of overlap. Crease this fold sharply as well. You will now have a hexagonal shape.
- Apply the Adhesive: Lift the bottom flap you just folded. Apply glue to the underlying surface of the top flap and also to the small triangular areas to the left and right that will be covered by the bottom flap. You want to create a secure seal across the entire bottom. Be thorough but avoid using so much glue that it squeezes out.
- Seal the Bottom: Press the bottom flap back down firmly onto the glued areas. Run your finger or bone folder over the entire sealed section to ensure good adhesion and a flat, strong base.
Allow the glue a few moments to set. You have now completed the structural base of your paper bag. If you were to peek inside the paper tube, you would see a clean, rectangular bottom.
Troubleshooting a Wobbly Base
What if, after all this, the bag does not want to stand up straight? This is a common issue for first-timers, and it almost always traces back to a lack of symmetry in the diamond fold.
- Uneven Diamond: If the diamond you created in the first step was lopsided, the final base will not be a perfect rectangle, causing the bag to lean. The solution is to be more meticulous when opening the bottom flap. Ensure the center of that section is pushed down exactly along the bag's central axis.
- Misaligned Flaps: If the top and bottom flaps you folded over were not parallel to the horizontal center of the diamond, the final sealed edge will be crooked. Use the creases as your guide to keep everything straight.
- Insufficient Creasing: If the folds of the diamond were not sharp enough, the base will lack the defined edges it needs to sit flat. Go back and reinforce your creases.
Do not be discouraged if your first attempt is not perfect. Learning how to make the easiest paper bag is a skill, and like any skill, it improves with practice. Each bag you make will be better than the last as your hands learn the rhythm and logic of the folds.
Step 4: Finalizing the Bag's Shape
The most technically challenging work is behind you. You have constructed a sealed paper tube with a sturdy, flat bottom. However, it still looks like a flattened object. The final step in the main construction is to give the bag its three-dimensional form and add the professional-looking side creases, known as gussets. This is the moment the object truly becomes a bag.
Opening the Bag and Defining the Sides
This is a simple yet deeply satisfying step.
- Let the Glue Dry: Before proceeding, give the glue on the bottom a few minutes to cure completely. If you try to open the bag while the glue is wet, you risk pulling the seams apart.
- Gently Open: Reach your hand inside the open end of the paper tube. Gently push outwards from the inside, encouraging the flattened tube to open into a rectangular shape.
- Square the Bottom: As you open the bag, press down on the interior of the bottom with your fingers to ensure it is flat. You can now stand the bag up on your work surface. It should stand freely on its newly formed base. Take a moment to admire your work. You have transformed a flat sheet into a standing structure.
Creating the Side Creases (Gussets) for a Professional Look
The bag will stand now, but it still looks a bit like a simple boxy tube. The final touch is to add gussets, the inward-facing folds on the sides that allow the bag to expand and collapse neatly.
- Identify the Side Edges: Look at your standing bag from the top. You will see it has four vertical edges. The front and back are the wider panels, and the left and right are the narrower side panels.
- Fold the Sides Inward: Take one of the side panels. Gently push the vertical center of this panel inward, towards the interior of the bag. As you do this, the original corner creases will fold outward.
- Align and Crease: You want to create a new, sharp crease down the center of the side panel, while reinforcing the original corner creases. The goal is for the new inward fold to be perfectly centered on the side panel. You can do this by eye, or for more precision, you can lightly flatten the bag again and fold the side edges in to meet the main body.
- Repeat on the Other Side: Once you have created a neat, sharp gusset on one side, repeat the exact same process on the opposite side. Try to make the depth of the gusset fold the same on both sides for a symmetrical appearance.
These gussets do two things. First, they give the bag a more finished, commercial look. Second, they are functional, allowing the bag to be folded flat for storage and to open wide to accommodate its contents.
A Mental Exercise: Visualizing the Bag's Three-dimensional Form
Take a moment to examine the geometry you have just created. Look at the way the bottom folds interact with the new side gussets. See how the creases you made when the bag was flat now define its three-dimensional structure. This interplay of flat planes and folded lines is the essence of paper engineering, a field that ranges from simple crafts like this to complex pop-up books and even deployable structures in aerospace technology.
By understanding not just how to fold the paper but why those folds create the form they do, you deepen your appreciation for the design. You are not just following instructions; you are engaging in a process of spatial reasoning. This deeper understanding is what will allow you to adapt and innovate, to create bags of different shapes and sizes, because you grasp the underlying principles at play. The process of learning how to make the easiest paper bag is an introduction to this fascinating world of transforming the simple into the complex.
Step 5: Adding Handles and Personal Touches
Your bag is now structurally complete. It can stand on its own and hold objects. The final stage is to add functionality and personality. Handles make the bag easier to carry, while other embellishments transform it from a generic container into a unique, customized creation. This is where your artistic sensibilities can truly shine, turning a simple craft project into a personalized gift or a branded piece of packaging.
Crafting Simple Paper Handles
One of the most straightforward ways to add handles is to make them from the same paper as the bag.
- Cut Paper Strips: Cut two strips of paper. A good dimension to start with is 1 inch wide and about 6-8 inches long. If you used heavy cardstock for the bag, you can use the same material for the handles. If you used thinner paper, it is a good idea to fold the strips in half lengthwise to double their thickness and strength.
- Attach the Handles: Take one strip and form it into a loop. Apply glue to the last 1/2 inch of each end of the strip.
- Position and Secure: Press the glued ends onto the inside top edge of the bag, one on the front panel and one on the back. Position them an equal distance from the side edges for a balanced look. Press firmly and hold for a moment to ensure a good bond.
- Repeat for the Second Handle: Do the same for the other side of the bag with the second paper strip.
Paper handles are quick and maintain a consistent look, but they are best suited for lightweight contents as they can be prone to tearing if the bag is overloaded.
Attaching Ribbon or Twine Handles
For a more durable and often more elegant handle, ribbon or twine is an excellent choice. This method requires a hole punch.
| Handle Type | Materials | Strength | Aesthetic | Best For |
|---|---|---|---|---|
| Paper Strip | Matching paper, glue | Low | Cohesive, simple | Lightweight items, party favors |
| Twisted Paper | Kraft paper, glue | Medium | Rustic, commercial look | Shopping bags, lunch bags |
| Ribbon | Satin/grosgrain ribbon | Medium-High | Elegant, decorative | Gift bags, luxury items |
| Twine/Rope | Jute, cotton, or synthetic rope | High | Rustic, nautical, sturdy | Heavy items, grocery totes |
| Die-Cut | Part of the bag itself | Varies | Modern, integrated | Retail bags, promotional items |
- Reinforce the Top Edge: Before punching holes, it is wise to reinforce the top rim of the bag. You can do this by folding the top 1-inch edge of the bag inward and gluing it down. This creates a double layer of paper where the handles will attach, distributing the stress and preventing tearing.
- Punch the Holes: Use a standard hole punch to create two holes on the front panel and two on the back. Space them evenly. For example, on a 4-inch wide bag, you might punch the holes 1 inch from each side.
- Cut Your Ribbon or Twine: Cut two equal lengths of your chosen material. A length of 12-15 inches is usually sufficient for a comfortable handle.
- Thread and Knot: Thread one end of a ribbon through one hole from the outside to the inside. Tie a secure double knot on the inside to prevent it from pulling through. You can also tie the knot around a small washer or a piece of cardboard for extra security if the bag will hold heavy items. Thread the other end of the same ribbon through the second hole on the same panel and knot it in the same way.
- Repeat on the Other Side: Attach the second handle to the back panel of the bag.
Exploring Advanced Customization: Stamps, Drawings, and Labels
With the structure and handles complete, the bag is your canvas. If you did not add decorations to the flat paper at the beginning, you can still add many personal touches now.
- Stamping: You can use rubber stamps to add small motifs or patterns to the finished bag.
- Drawing: Use markers, colored pencils, or pens to add illustrations or hand-lettered messages.
- Collage: Glue on cutouts from magazines, old maps, or decorative paper to create a unique collage effect.
- Custom Labels: For a truly professional finish, especially for small businesses or events, consider using custom-printed adhesive labels. A simple label with a logo, a "thank you" message, or the ingredients of the enclosed treat can instantly elevate the packaging.
- Tags : Create a small, separate tag from matching cardstock. Write a message on it, punch a hole, and tie it to one of the handles with a small piece of twine.
This final stage of customization is what infuses the object with meaning. It is the difference between a container and a keepsake.
Beyond the Basics: Scaling and Adapting Your Design
Once you have confidently mastered how to make the easiest paper bag using a standard sheet of paper, a whole world of possibilities opens up. The fundamental technique—forming a tube, folding the diamond base, and creating gussets—is a universal principle that can be scaled up or down and adapted for a wide variety of materials and purposes. This is where you can transition from following a recipe to becoming a true designer.
Making Larger Bags for Groceries or Shopping
To create a larger, more robust bag, like one for carrying groceries, you need to change two things: the size and type of your paper.
- Material: You will need a large sheet of heavy-duty paper. A roll of brown Kraft paper with a weight of at least 70 lb (100 gsm) is ideal. This material has the strength to withstand the weight and potential sharp corners of grocery items.
- Dimensions: You will apply the same proportional logic as before, just on a larger scale. For a standard grocery bag (approx. 12 inches wide, 17 inches tall, 7 inches deep), you would need a sheet of paper that is roughly 40 inches wide [(12×2) + (7×2) + 2" overlap] and 21 inches tall (17" + half of 7").
- Reinforcements: For a bag of this size, reinforcements are not optional; they are necessary. Always fold the top rim over to create a stronger edge for the handles. For the handles themselves, a strong rope or twisted paper handle is much more suitable than a simple paper strip. Consider reinforcing the bottom by cutting a rectangular piece of cardboard to fit snugly inside the base. This will distribute the weight of the contents and prevent sagging.
Creating Small Bags for Party Favors or Jewelry
At the other end of the spectrum, the same technique can be scaled down to create tiny, delicate bags.
- Material: Here, you can use more decorative but less structural paper. Scrapbook paper, elegant handmade paper, or even high-quality wrapping paper will work beautifully.
- Dimensions: For a small bag just a few inches high, you might start with a piece of paper that is only 6 inches by 4 inches.
- Tools: Precision becomes even more critical at a small scale. Using a craft knife for cutting and a bone folder for creasing will help you achieve the neat, sharp folds that are necessary for a tiny bag to look good. A standard glue stick is often the best adhesive choice, as liquid glue can be messy and can easily wrinkle the thin paper.
- Handles: A thin, delicate satin ribbon or a piece of fine embroidery floss makes a perfect handle for a small-scale bag.
Adapting the Technique for Different Materials
While paper is in the name, the core folding principles can be applied to other flexible sheet materials. You could experiment with creating a bag from sturdy fabric treated with a stiffener, a sheet of non-woven polypropylene for a reusable tote, or even a sheet of thin, flexible plastic. Each material will present its own challenges. Fabric will not hold a crease as sharply as paper, so ironing the folds might be necessary. Plastic may require special adhesives. These experiments push the boundaries of the craft and can lead to innovative and highly functional designs. For instance, adapting the flat-bottom design for use with food-safe materials is the basis for much of today's flexible paper food packaging.
The Role of Custom Bags in Small Business Branding
For entrepreneurs, artists, and market vendors, the ability to create custom packaging is a significant advantage. A handmade bag is a potent branding tool. It tells a story of craftsmanship, care, and attention to detail—qualities that customers often associate with the product inside.
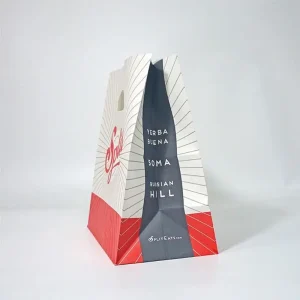
Imagine a jeweler selling a necklace. Presenting it in a small, custom-made bag from beautiful paper with a ribbon handle adds immense value and creates a memorable customer experience. Consider a baker at a farmers' market. Using simple brown paper bags stamped with their logo for selling cookies or pastries reinforces a rustic, artisanal brand identity. Professional paper packaging suppliers offer a wide range of options, but for small batches or special occasions, the ability to produce your own unique packaging is an invaluable skill. It allows for rapid prototyping of designs and a level of personalization that is difficult to achieve with large, mass-ordered supplies. For those seeking a more polished, uniform look, exploring professional options like custom die-cut paper bags can provide inspiration for more advanced DIY projects.
The Environmental and Economic Dimensions of DIY Paper Bags
Creating your own paper bags is more than a craft; it is an act that engages with some of the most pressing economic and environmental questions of our time. It is a small but tangible way to participate in the circular economy, to reduce waste, and to reconsider our relationship with the disposable objects that populate our lives. By choosing to make rather than buy, you are making a statement about value, resources, and sustainability.
Sustainability in Your Hands: Upcycling and Material Choice
The most significant environmental benefit of making your own paper bags lies in the potential for upcycling. Upcycling is the act of taking a waste material and transforming it into a new product of higher quality or value. Every household generates a steady stream of paper that is perfect for this purpose: old newspapers, magazines, promotional flyers, used wrapping paper from holidays, and even children's drawings that are no longer destined for the refrigerator door.
By learning how to make the easiest paper bag, you gain the ability to divert this material from the waste stream. A newspaper can become a small bag for collecting kitchen scraps for compost. A colorful page from a magazine can become a vibrant gift bag. This practice not only reduces landfill waste but also lessens the demand for virgin materials. When you do need to use new paper, you can make conscious choices. Opting for paper with a high percentage of recycled content or paper certified by organizations like the Forest Stewardship Council (FSC) ensures that your materials are sourced responsibly. The final product is not just a bag; it is a fully biodegradable object that can be recycled or composted at the end of its life, contributing to a closed-loop system (Oyang Group, 2024).
Cost-Effectiveness for Small-Scale Operations
For individuals, hobbyists, or very small businesses, the economic argument for DIY paper bags is compelling. While the cost of a single mass-produced paper bag is minuscule, the costs add up. More importantly, purchasing bags often requires buying in bulk quantities that may be impractical for someone who only needs a few dozen bags for a specific event or market day.
The materials for making paper bags are either free (if upcycled) or very inexpensive. A roll of Kraft paper, a glue stick, and some twine represent a small initial investment that can yield hundreds of bags. This cost-effectiveness allows for greater flexibility and experimentation without financial risk. It empowers small-scale producers to provide quality packaging for their products without having to meet the minimum order quantities set by commercial suppliers. This economic independence is a crucial advantage for those just starting a business or for anyone operating on a tight budget.
The Bigger Picture: DIY vs. Industrial Production
It is important to maintain a realistic perspective. Hand-making a paper bag is a slow, deliberate process. It cannot compete with the sheer efficiency of industrial production, where modern machines can churn out thousands of bags per hour (OT Pack, 2024). A life cycle assessment of paper bags reveals that the industrial process, while efficient, has its own environmental footprint, involving energy consumption, water usage, and transportation (ScienceDirect, 2024).
Making a bag by hand has a negligible environmental impact on a global scale, but its true value is educational and philosophical. It reconnects us with the process of manufacturing. It forces us to confront the amount of time and effort required to create an object we normally discard without a second thought. This experience can foster a deeper respect for manufactured goods and encourage more mindful consumption. It highlights the hidden labor and resources embedded in even the simplest of items. Learning how to make the easiest paper bag is not a solution to global supply chain issues, but it is a powerful personal tool for re-evaluating our role as consumers.
Frequently Asked Questions (FAQ)
What's the best paper to use for a strong bag? For strength, Kraft paper with a weight of 60 lb (90 gsm) or higher is an excellent choice. Cardstock (65-100 lb) is also very strong and rigid, making it ideal for luxury gift bags that need to hold their shape and support heavier items. Avoid using thin, decorative wrapping paper for anything heavy, as it is prone to tearing.
How can I make handles that won't rip? The key is reinforcement. First, fold the top 1-inch rim of the bag inward and glue it down to create a double-thick layer of paper. When you attach the handles, you are attaching them to this stronger, reinforced area. For the handles themselves, use a durable material like twine, rope, or multiple strands of ribbon. When tying them on the inside, knot them securely. For very heavy loads, tying the knot around a small cardboard square or a plastic washer will distribute the stress over a wider area and prevent the knot from pulling through the hole.
Can I make a paper bag without glue? Yes, it is possible to make a bag using clever folding techniques inspired by origami, which rely on interlocking folds to hold the structure together. These designs are often more complex and may not be as durable as a glued bag, but they are a fascinating challenge. A simpler "no-glue" method involves using a stapler to secure the central seam and the bottom flaps, though this is less aesthetically pleasing.
How do I adjust the dimensions for a wider or taller bag? To make a taller bag, start with a taller sheet of paper. The height of your paper directly corresponds to the bag's final height. To make a wider or deeper bag, you need to start with a wider sheet of paper. The width of your paper determines the bag's circumference (front + back + both sides). To increase the bag's depth (gusset), you simply make the initial bottom fold larger.
Are homemade paper bags waterproof? No, standard paper bags are not waterproof and will lose their structural integrity quickly when wet. To create a water-resistant bag, you could use specialty waxed paper, which is often used in paper food packaging. Alternatively, you could try to "waterproof" your finished bag by coating it with a clear acrylic sealer spray or by laminating the paper before you begin, but these additions may compromise the bag's recyclability and biodegradability.
What is the historical significance of the flat-bottomed paper bag? The invention of the flat-bottomed paper bag by Margaret E. Knight in the 1870s was a major innovation in retail and packaging. Before her invention, bags were V-shaped, like envelopes, and could not stand on their own. The flat bottom allowed bags to be placed on a counter and packed easily, dramatically increasing their utility and paving the way for the modern self-serve grocery shopping experience (YoonPak, 2024).
How does making my own bag compare to buying eco-friendly paper bags? Making your own bag, especially from upcycled materials like old newspapers or maps, is arguably the most eco-friendly option as it diverts waste from landfills and uses no new resources. Commercially produced eco-friendly paper bags are an excellent and convenient alternative. They are typically made from recycled or sustainably sourced materials and are designed for durability and reuse. The choice depends on your priorities: time and convenience versus the satisfaction and hyper-sustainability of a DIY approach.
Conclusion
The path from a simple, flat sheet of paper to a functional, three-dimensional bag is a short but profound journey. It is an exercise in precision, a lesson in simple geometry, and an act of creation. By following these steps, you have done more than just learn a new craft; you have engaged with a history of human ingenuity, from the factory floors of the 19th century to the contemporary movement for greater sustainability. You have equipped yourself with a skill that is at once practical, economical, and expressive.
The ability to make a paper bag is the ability to create custom packaging for a gift, to provide a branded container for a small business product, or to simply organize your home with upcycled materials. It fosters a sense of resourcefulness and a deeper appreciation for the design and labor hidden within everyday objects. The finished bag is useful, but the true value lies in the process itself—in the mindful attention to the folds, the satisfaction of a perfectly formed base, and the creative freedom of personalization. This knowledge is now yours to adapt, to scale, and to share.
References
DigPaper. (2025, May 28). The ultimate paper bag guide: Materials, sizes, styles, & more!digpaper.com
Oyang Group. (2024, June 14). How are paper bags made a step-by-step guide. oyang-group.com
OT Pack. (2024, July 10). 101 guide to paper bag making.
ScienceDirect. (2024, September 1). Life cycle assessment of plastic and paper carrying bags in the Philippines.
The Paper Bag. (n.d.). Publications. Retrieved July 18, 2024, from
Yanxiyan. (2023, September 18). Types of paper bags: All you need to know.
YoonPak. (2024, May 20). Explore different types of paper bags: A comprehensive guide. yoonpak.com